
For new customers this is a means of quickly becoming acquainted with your alarm system and the many features available. The links above in the red bar will take you to our Contract Terms, Owner Manuals, Total Connect and More.
Important updates and new features are also posted in this area. Simply click on a drop down in order to find answers to many common questions. You own your alarm system and you alone are responsible for assuring that it is in good operating condition.
We also have a Blog page that provides valuable additional information, so check that out, too.
These systems are capable of doing all sorts of handy things that you may never have considered. If you have a simple question, use the Contact link and we'll post the question and answer, right here. For immediate answers, call or text.
Newer systems can self test, when set up to do so, daily, weekly, or monthly, if so programmed. Auto testing is a paid feature, so if you want this, you must call and register for it. Otherwise, you can test your system operation by calling Dave. I will place you on TEST with central and you will set your system into alarm in order to verify that zones are fully operational and reporting. It is your responsibility to assure that your alarm is operating properly.
This indicates that your system attempted to dial or reach central station but " Failed to Communicate".
(a) If you still have a land line dialer, assess if anyone has been to your home recently and worked on your land line phone system. Sometimes phone company people who do not understand the connections of alarm systems will actually disconnect the wiring, or make changes that prevent transmission. Switching your phone to VOIP may also kill your dialer. Comcast and similar companies can install units that will allow your alarm to communicate over their VOIP.
(b) Newer systems use WI-FI and Cell dialers, which can sometimes lose their signal because of service interruptions. Cell dialers seldom have issues but it is possible. Since we set up every system with both, your chances of a Failure to Communicate are very slim. If one system fails, the other will take over the job. Still, if you see this, call ASAP. If you are having a power outage, simply wait until all power is restored.
It could be that your AC power has been interrupted, which caused the back up battery in your alarm system to go low, or a sensor may have a low battery. If you lost power for a while, then don't worry, once the power is restored, it should recharge your control panel battery in less than twenty-four hours. A panel battery generally last for over five years before you'll need to replace it.
If a transmitter battery has gone low, then you need to change it. The good news is that virtually all occurrences report to central, who then report the issue to you. Batteries in door/window contacts and motion detectors last about three years, depending on the amount of action they experience. Smoke detectors may last up to five years. If a battery is three or more years old and requires changing, it's likely that other similar batteries will also soon need replacement, so it may be wise to change all batteries at once. Having batteries on hand is a very good idea because they always seem to decide to die in the middle of the night and that beeping is no fun.
Batteries are available at most camera stores, or pharmacies. Just ask for "three volt lithium", or whatever you require and bring along an old battery to compare. System batteries must be of the exact precise type, or they could damage your system. Use the code on the battery to order a new one.
Before replacing the new batteries in transmitters, it is best to short circuit the positive and negative terminals inside the transmitter. This resets the transmitter so that it will clear the keypad upon powering up. If you do not do this, it will still restore but it can take up to 24 hours. Always assure polarity status and always double check it. When opening the unit, the tamper should sound on the keypad. Touching the keypad, or disarming, should silence the alert.
There is now a handy link for that, above. Change your phone number, add someone to the call list, or whatever change you require. If you fail to get a response within 24 hours, Call or Text High Level Alarms and we'll take care of it for you.
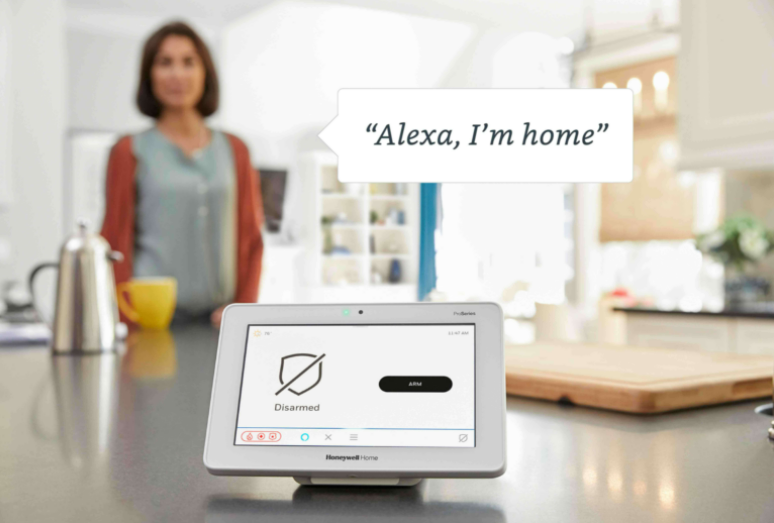
It's a website, or an app, that you go to on your PC, or tablet, or phone, where you can set up and control Total Connect features and functions. It allows you to control, automation, view cameras, set up scenes and much more. it can essentially be considered, your anywhere key pad. In order for each operation to function, High Level Alarms may first need to program that function as available in your system. For instance; ZWave must be initiated in our program, before you can utilize it as part of your app.
Most everyone prefers to use a cell phone, or a tablet with the app but Total Connect can also be viewed on a PC. After initial programming by High Level Alarms, Click the TC2.0 link on this page. You can set up, or utilize Total Connect in pretty much the same way as you would on your phone. The login information required should already have been emailed to you but if not, just call and request it.
Alarmnet considers video service an add on to minotoring and thereby charges a negligeable fee for this service.
There are currently three models available and they are very simple for anyone to set up. Newer controls such as the Lyric and ProSeries have wi-fi capability built in and thereby, they are ready to operatel all wi-fi devices like cams and zwave for automation.
To set up Call Dave to activate cameras in your program, which is a billable feature. Afterward you will need to utilize the TC2.0 App on your phone.  Open the app, click on camera icon at bottom, then look for ( add camera ) at the top of the page. Follow the prompts and in minutes you'll be up and running.
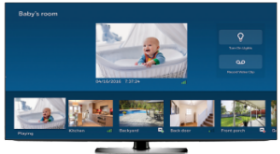
You'll be able to view your cams, ( maximum of six, ) on your phone, tablet or pc. Viewing on the control panel key pad is only available on a Pro Series control. Since Resideo does occasioanl updates to software, there is a possibility that it could become available on Lyric, too.
Although cams don't have extremely long life expectancy, some have lasted many years. Here is what you need to check:
Is the camera on a switched outlet. If it is, make sure the switch is "ON."
Next, assure that the camera is securely plugged in. Verify that the camera is getting power. Try plugging in a nightlight, or lamp, into the same outlet where you plug in the camera and verify that you do have power in that outlet.
If the outlet has a built in breaker, check to see that it hasn't popped. Most of the time, no power is the reason for camera failure.
If you are certain that you have power, try this: Unplug the camera, wait a few seconds and plug it back in. Now give it a few minutes to come back on line. Sometimes this reset is all that's required. If that doesn't work, perform the same action with your router. Again, wait a minute or two, till it resets.
A blocked signal can also affect camera transmission. Sometimes the signal is marginal and it doesn't take much to interfere with it. You can view your camera signal directly on your phone app in the camera section.
The cell dialer of your Lyric or Pro Series generates a signal bar strength, which is metered in db (numerically) but this is not a customer viewable option. This fluctuates up or down, indicating good coverage, or not so good, coverage.
On the alarm system, whenever the numbers go into a range that is deemed less than acceptable, the alarm sends you a warning via keypad beeping, flashing, etc. and at the same time, it sends central station a warning, at which time they would notify you, so that everyone is advised that we should do something to improve the signal.
Chances are that in an emergency, the dialer would still be capable of sending the signal but the system is designed for demanding optimal performance.
The most likely cause of such a situation is living in a location where the line of sight to cell towers has one or more of the following issues: 1. far from the nearest cell towers, 2. signal is blocked or partially blocked, interrupting the transmission and cutting down the strength of a normal signal.
These radio signals are capable of penetrating through some materials but the more you place between the sender and receiver, the less will be received. The signal may go around some objects but this generally occurs more as a bounce feature, from one item to another, than actually curving around something. If the area has a mountainous, or hilly terrain, this may cause difficulty for the radio signal to reach its destination. Throw in some buildings, or trees, and the problem begins to compound.
The answer to solving the signal strength issue is rarely simple. The FCC does not allow us to over boost signals and give them more strength because that may interfere with other signals out there, so we have to live within their guidelines and parameters. We can't remove mountains, buildings, or mass areas of trees. Sometimes we can determine where the nearest cell tower is located and examine if there is something obvious that may be directly in the path of our receiver/sender, and if possible, we can make adjustments that will actually improve the signal.
Cutting an obvious tree may help but it may also be rather drastic. Since your new control can be plugged into any outlet, try to examine the area for a preferred line of sight to a tower. Never place a control near a fridge, or large metal object. Next, place it on the side of the house with the fewest walls facing toward cell towers. Sometimes, just a few feet in one direction, or another, can make the difference.
Lyric is the first system that was able to add the capability of plugging in an additional antenna. This should boost the
 signal just enough to send and receive signals without interruption in an area with fewer cell towers. In areas so remote that there is no signal whatsoever, it would be futile to bother even trying this, but where the signal is marginal, we only need a little more signal to bring us into acceptable range. We will assist you to resolve this issue, so long as it is possible. Where there is no cell service, but there is Wi-Fi, we may have to rely on having no backup and a possibly less reliable method of operation.
Every wireless transmitter, (door/window contacts, motion detectors, and control panel, etc.) has a tiny switch inside that will annunciate when the cover is opened. Door contacts can sound a tamper on occasion with heavy vibration, such as a door slamming shut. As the name implies, (tamper) is meant to give warning if someone messes with it, or opens the body of it.
That's why when you open a unit, such as to change a battery, it sounds locally and also calls central. Essentially, it self protects, which is a good thing.
To silence the sound, simply touch your screen, Arm/Disarm and it should return to normal. Central calls you as an added measure of security. We can remove this call process on "tamper," if for instance, a particular door slams too often and you know that it is not an intruder messing with your transmitter. Better however, to move the contact where it won't feel the shock of a door slamming. The annunciation is merely saying, I'm making you aware of a situation in case you wish to rectify the matter.
Should a contact, or other wireless, not reset after Arm/Disarm, then simply call for other alternatives.
I'm not going to pull punches on this, because Z-Wave is great, but setting it up can be a huge pain. If you want Z-Wave, ( add billable ) it first has to be programmed as an active feature in your system. You'll need to call me, so that I can toggle it into your program, which will allow your app to set up scenes, etc.. Each Zwave unit comes with it's own instructions, which yoiu must follow in order to marry it to your control. Tap on Automation, hit the down arrow in the next screen, tap on tools, tap include devices. The next step is to trigger the Z-Wave unit in order to force it to communicate with your control and this can differ depending on the zwave manufacturer. If you're lucky, it's a quick tap on the button and it logs in. To find out, use the back arrow and if you see something similar to Switch 003, then it's logged and you now have to rename it. Save the new name and back out of program. Now go to your TC2.0 app and you will need to title the type of switch, which is really just selecting a slot for it.
Now that it's in the system, you can set it up for a variety of functions via your phone app in the Scenes section. Oftentimes, what initially appears to be one scene, may actually be two. For instance, you may need to specify "ON" for one reason, and "OFF" for an entirely dissimilar reason. Like I said earlier, this is not a fun experience, until it's over.
You can purchase ZWave units anywhere you like. There are so many types with various functions that we'd rather not sell them. They are a great and fun feature but if you go this route, you should first have great patience, or some degree of knowledge for making electronic things work.
Code Lock is a new feature whereby entering a wrong code when attempting to disarm, then sends Central Station a notification of "Wrong Code." The notion is that a burglar may try various codes and eventually hit the number that disarms the system. I don't know of any other system on the market that can do that. Naturally, when such an attempt to disarm fails, we also will almost always have a "burglary" signal. Central will now call and request a password, which if verified will deter further action, such as sending police. However, more attempts of wrong code entry, (30 to be precise), will result in "Locking the System" and prevent disarming even with a proper code. The lock out time is fifteen minutes. At this point there are only two things that can be done to silence the alarm. Either wait fifteen minutes, or power cycle the control. My recommendation would be to wait the allotted time and try again, with a valid code, key fob, or cell phone app.
In order to operate a door lock via your control panel and Total Connect, first assure that your control is associated with your Wi-Fi.
Purchase your ZWave lock wherever you like. Install your lock per manufacturers instructions.
Go to your control, select ( Automation ), on the right hand side, tap the ( arrow down ), then select ( TOOLS ) and then select ( Add Devices ). Follow through and add your lock utilizing the directions that are included with your Lock. The result is that you are introducing the lock to the control so that it will then recognize it as a part of the system.
The following is a video on setting up with a Lyric Control. The process is essentially the same with a Pro Series system. https://www.youtube.com/watch?v=52Nw75k_5Ls
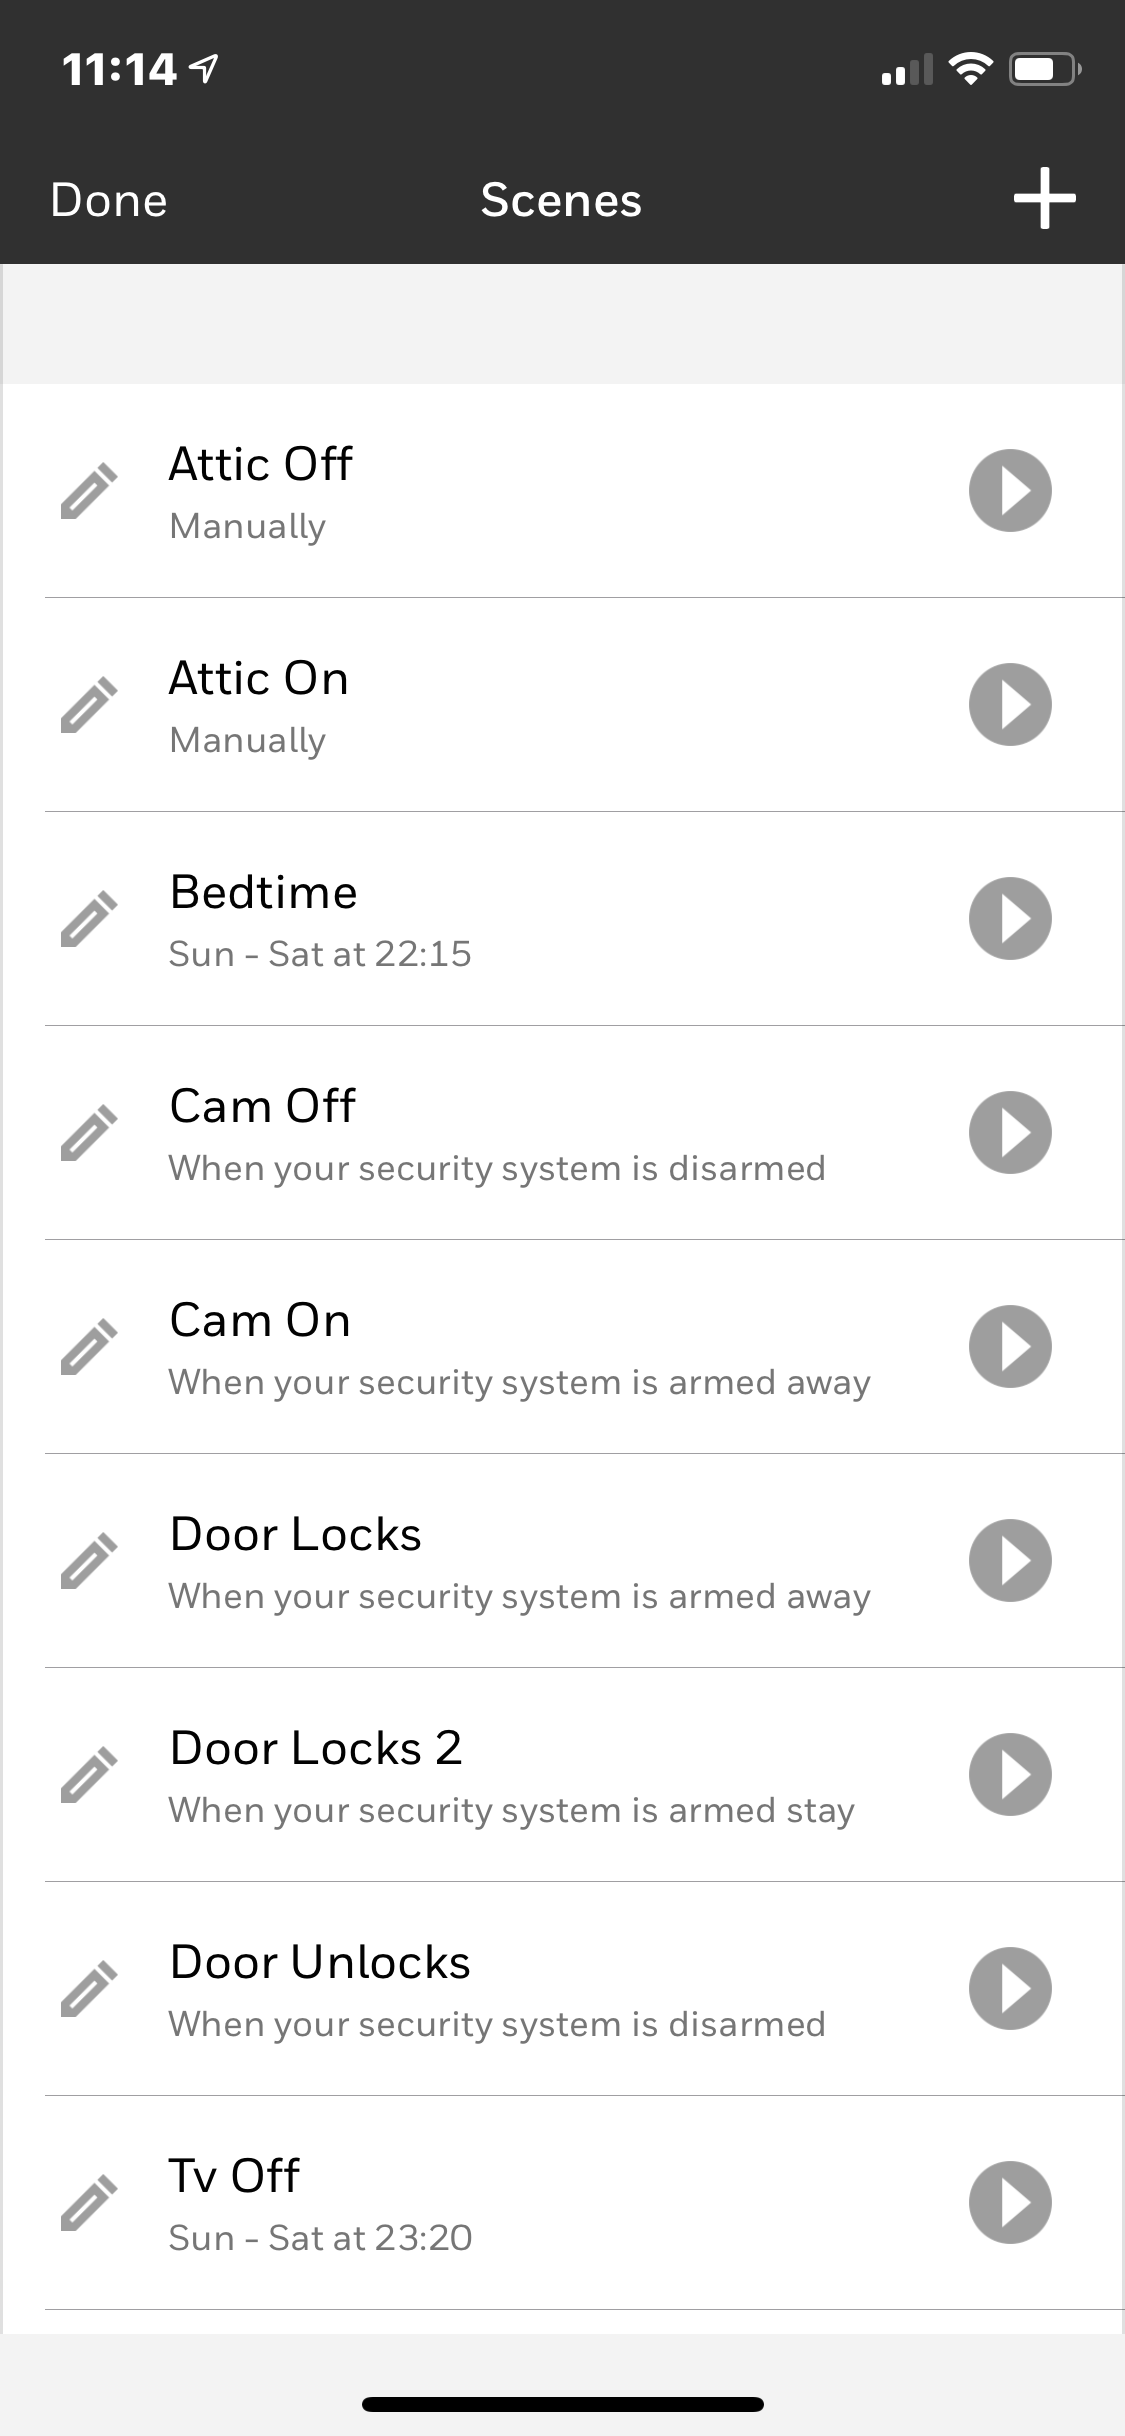
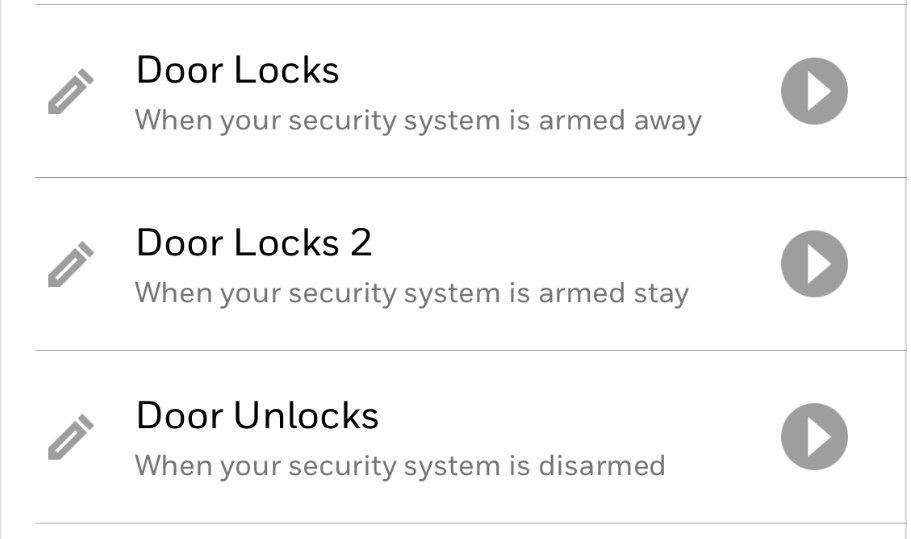
Before your lock can operate, Scenes need to be set up on your phone in TC2.0. There are three basic scenes that will tell both the alarm system and the lock how they should respond to specific inputs. Door Locks, Door Locks 2 and Door Unlocks. Do not try to perform additional Scenes, as they will cause conflict and unintended results.
Yale pin codes are only used in the event that the Yale lock is used as, self standing, without an alarm system. Once the alarm system operates the Yale lock, it will ignore the original pin code and utilize the alarm code to unlock, or lock, the door. In the event that you have previously set up a Yale pin code for your lock, they will be replaced with your alarm system user codes. All user codes will likely be set to operate in the same manner as the master code but user codes can be restricted from such things as disarming, when utilizing the door lock. If you have more than one code, you can choose which ones will operate the lock, within TC2.0.
End User must utilize TC 2.0 on a cell phone or Ipad to complete the following process:
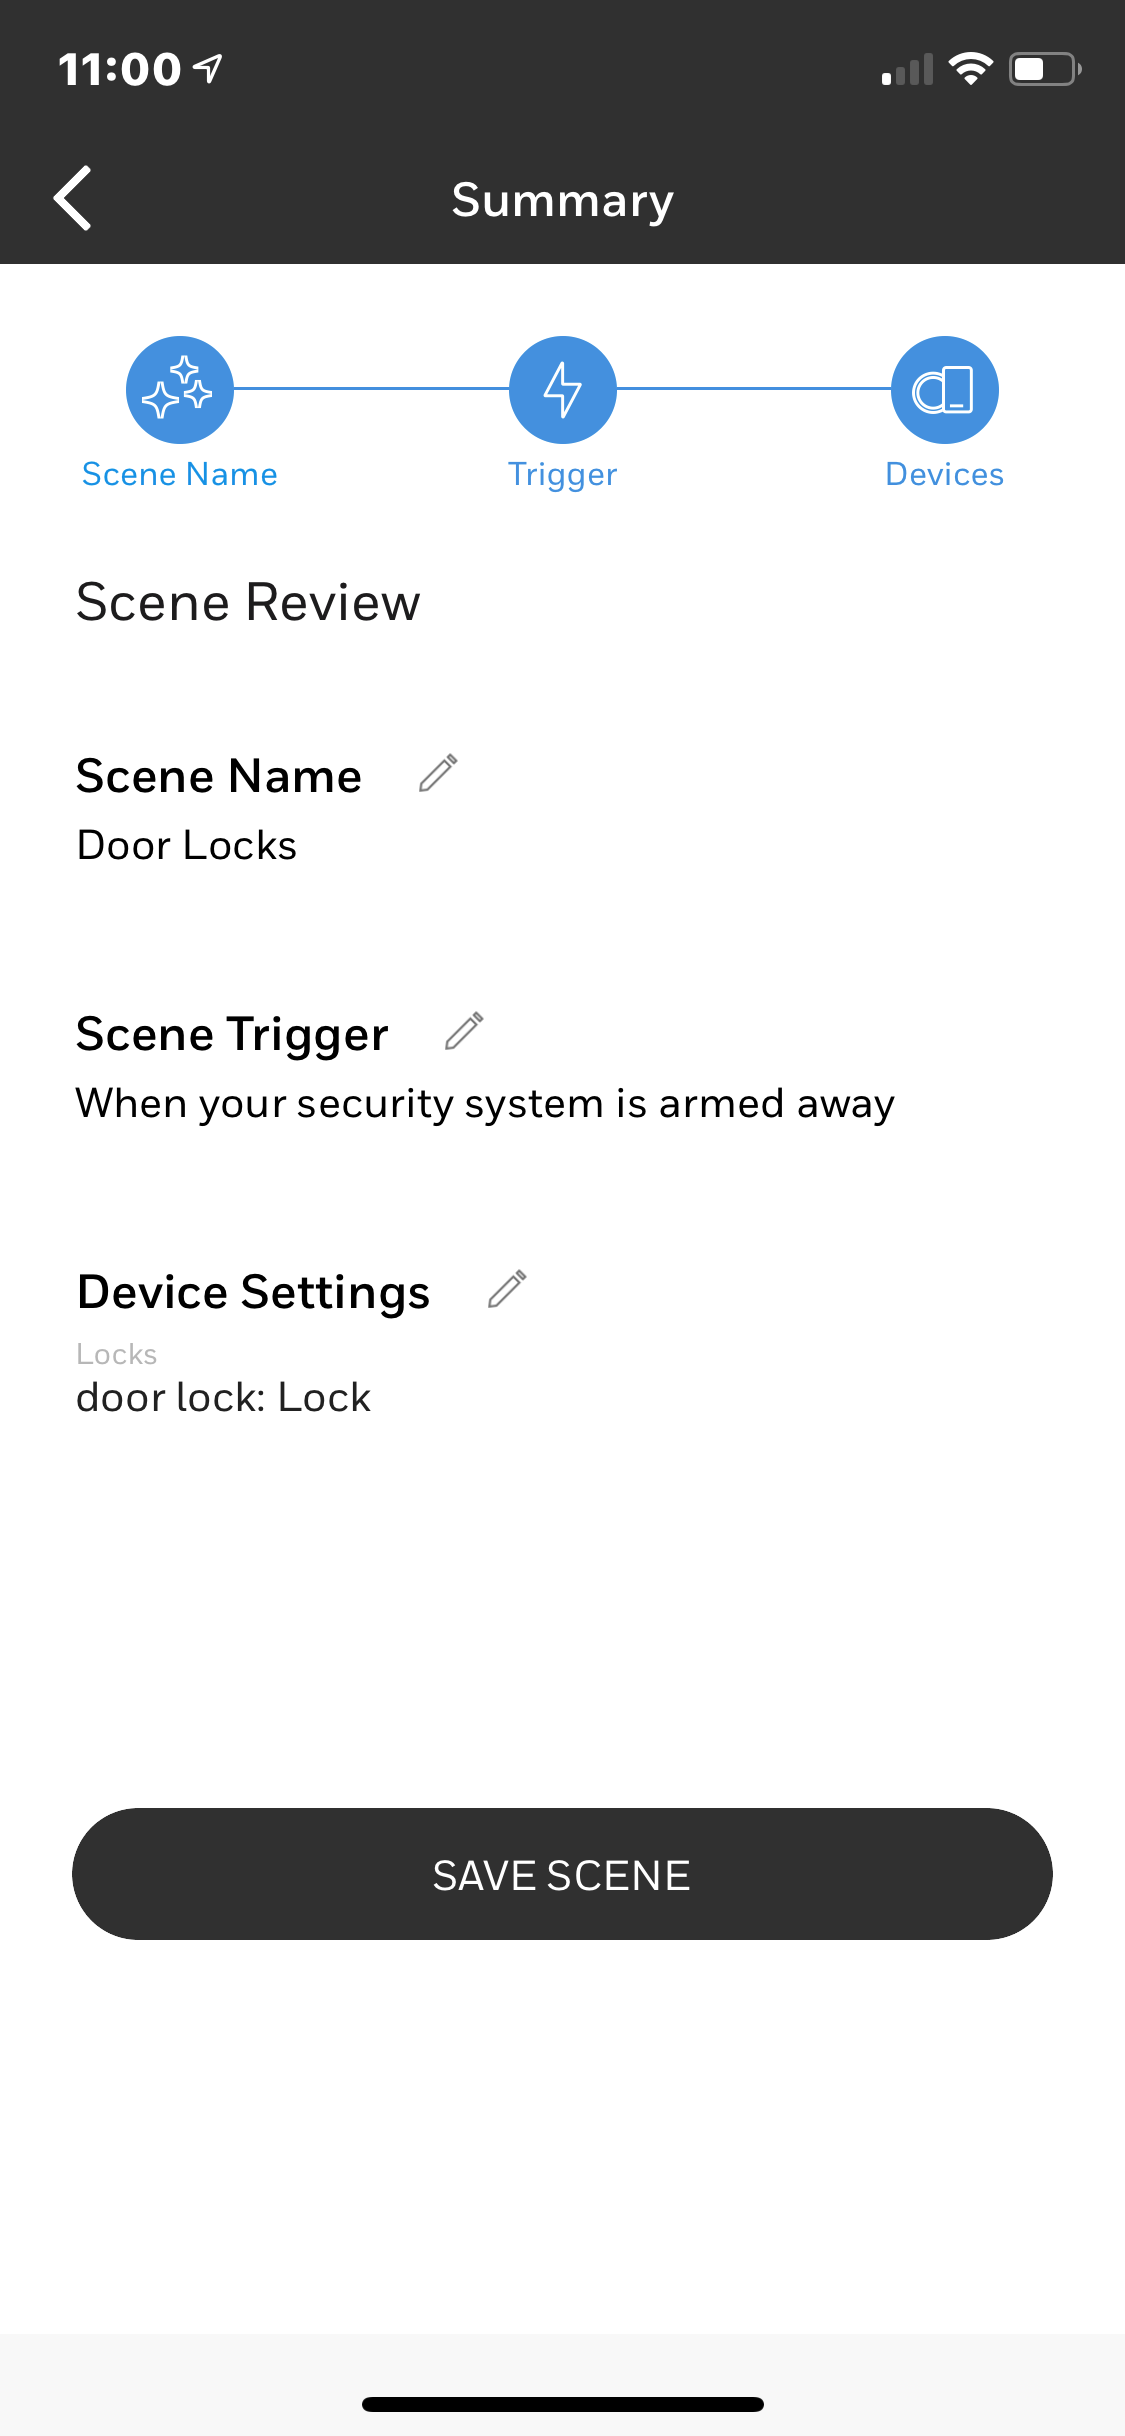
Shown below is an example of what your final scene of three door lock set ups should look like, after all three scenes mentioned above have been input
Step 1
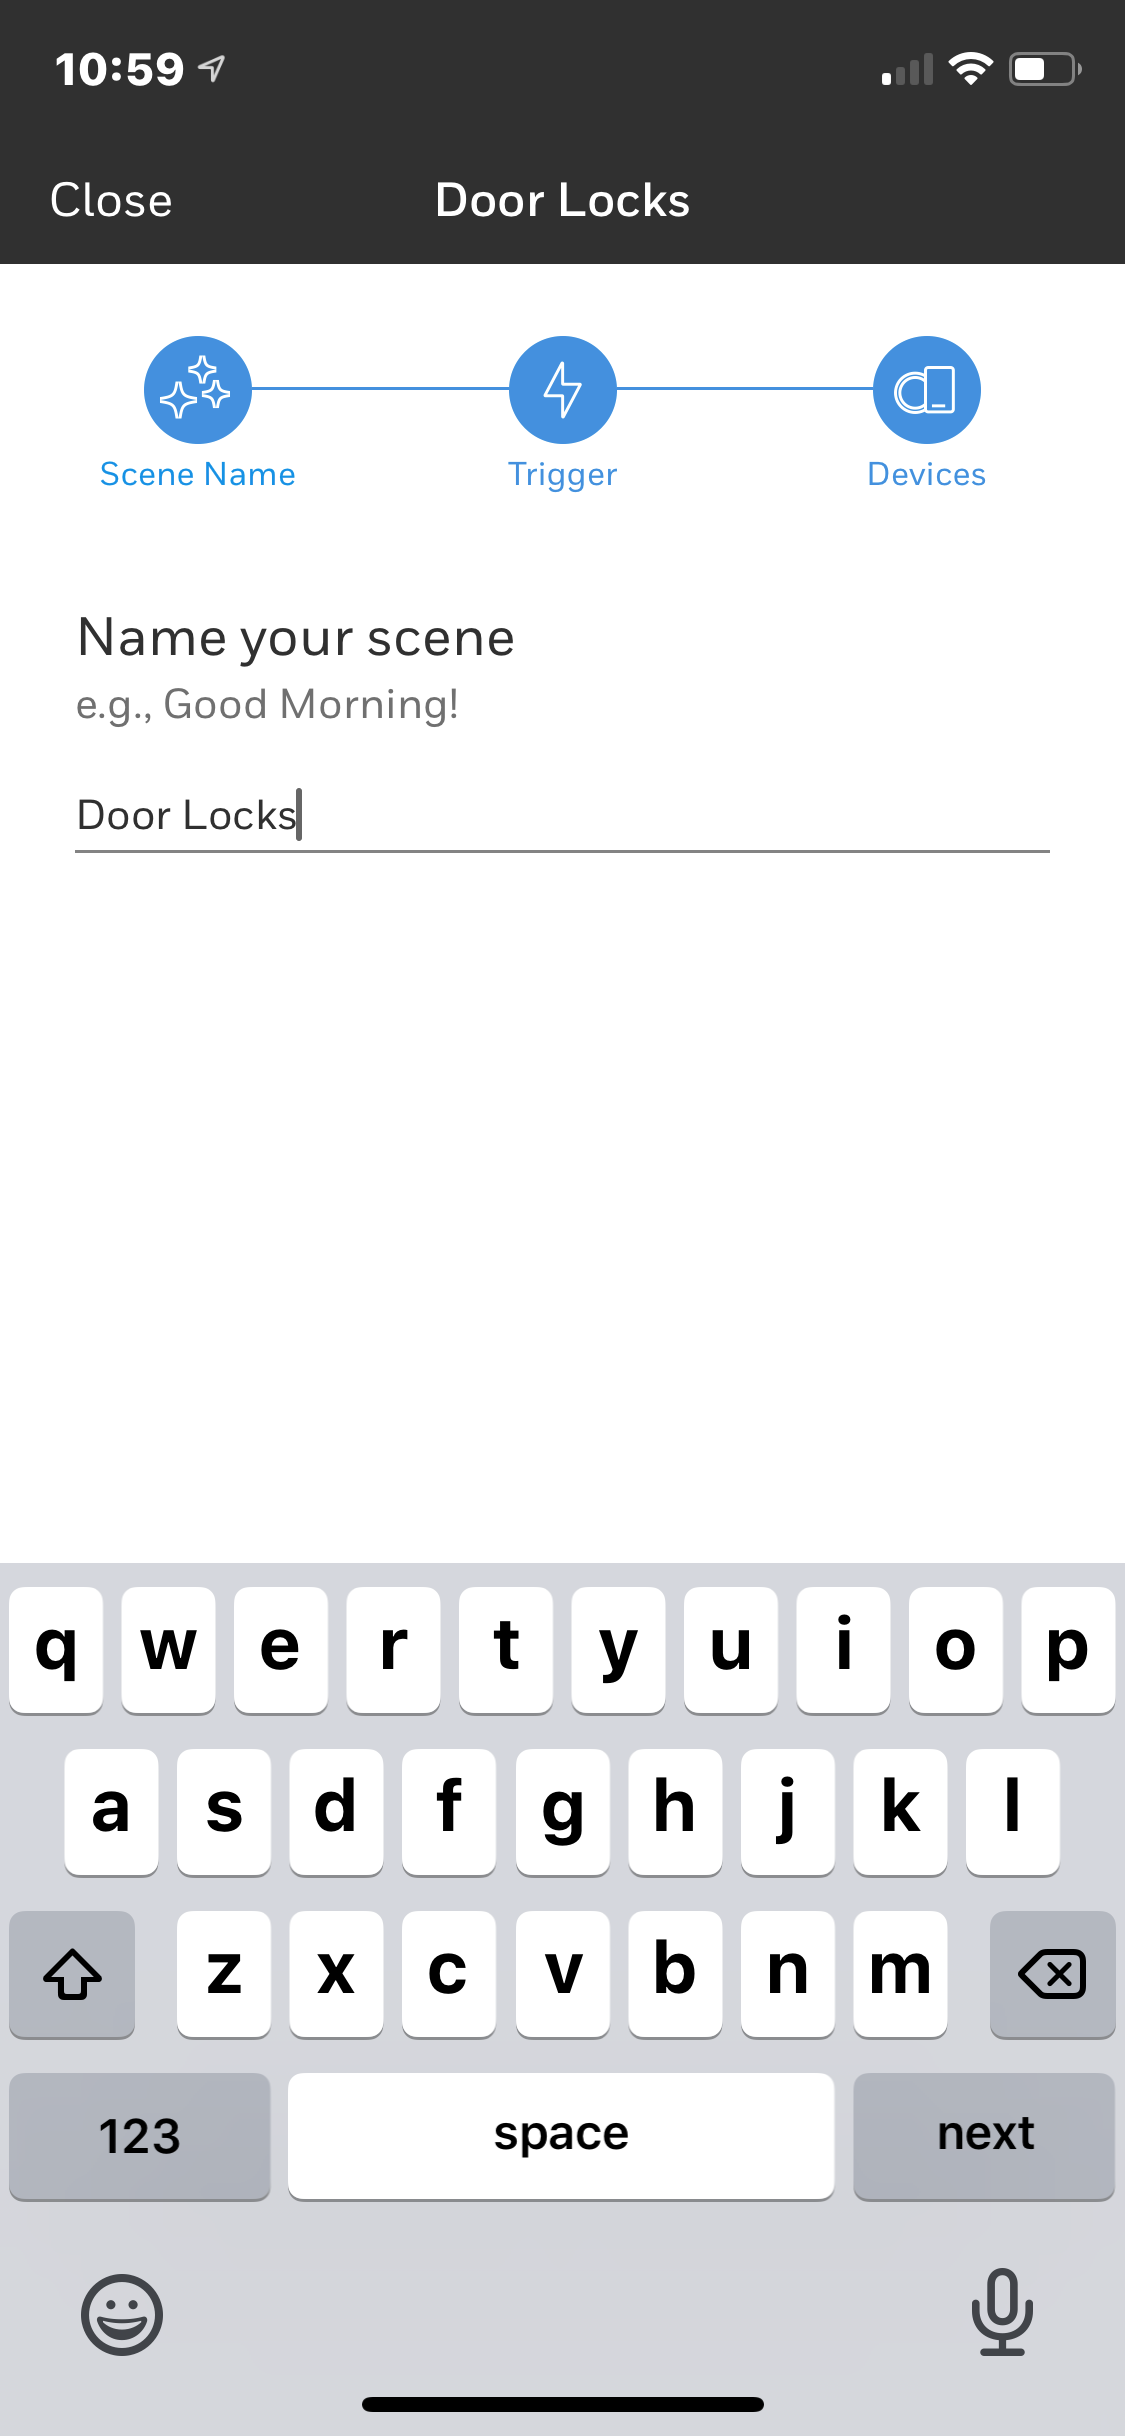
On your cell phone, Open the TC2.0 App main screen & at the bottom right TAP on "More". On the following screen, TAP on "Scenes" at top
Enter a short name to identify the Scene & TAP on Next near bottom. You may copy the names that I have used in order to simplify trouble shooting, if required later on. Each scene must be created individually but the process is similar since only the command will differ.
Step 2
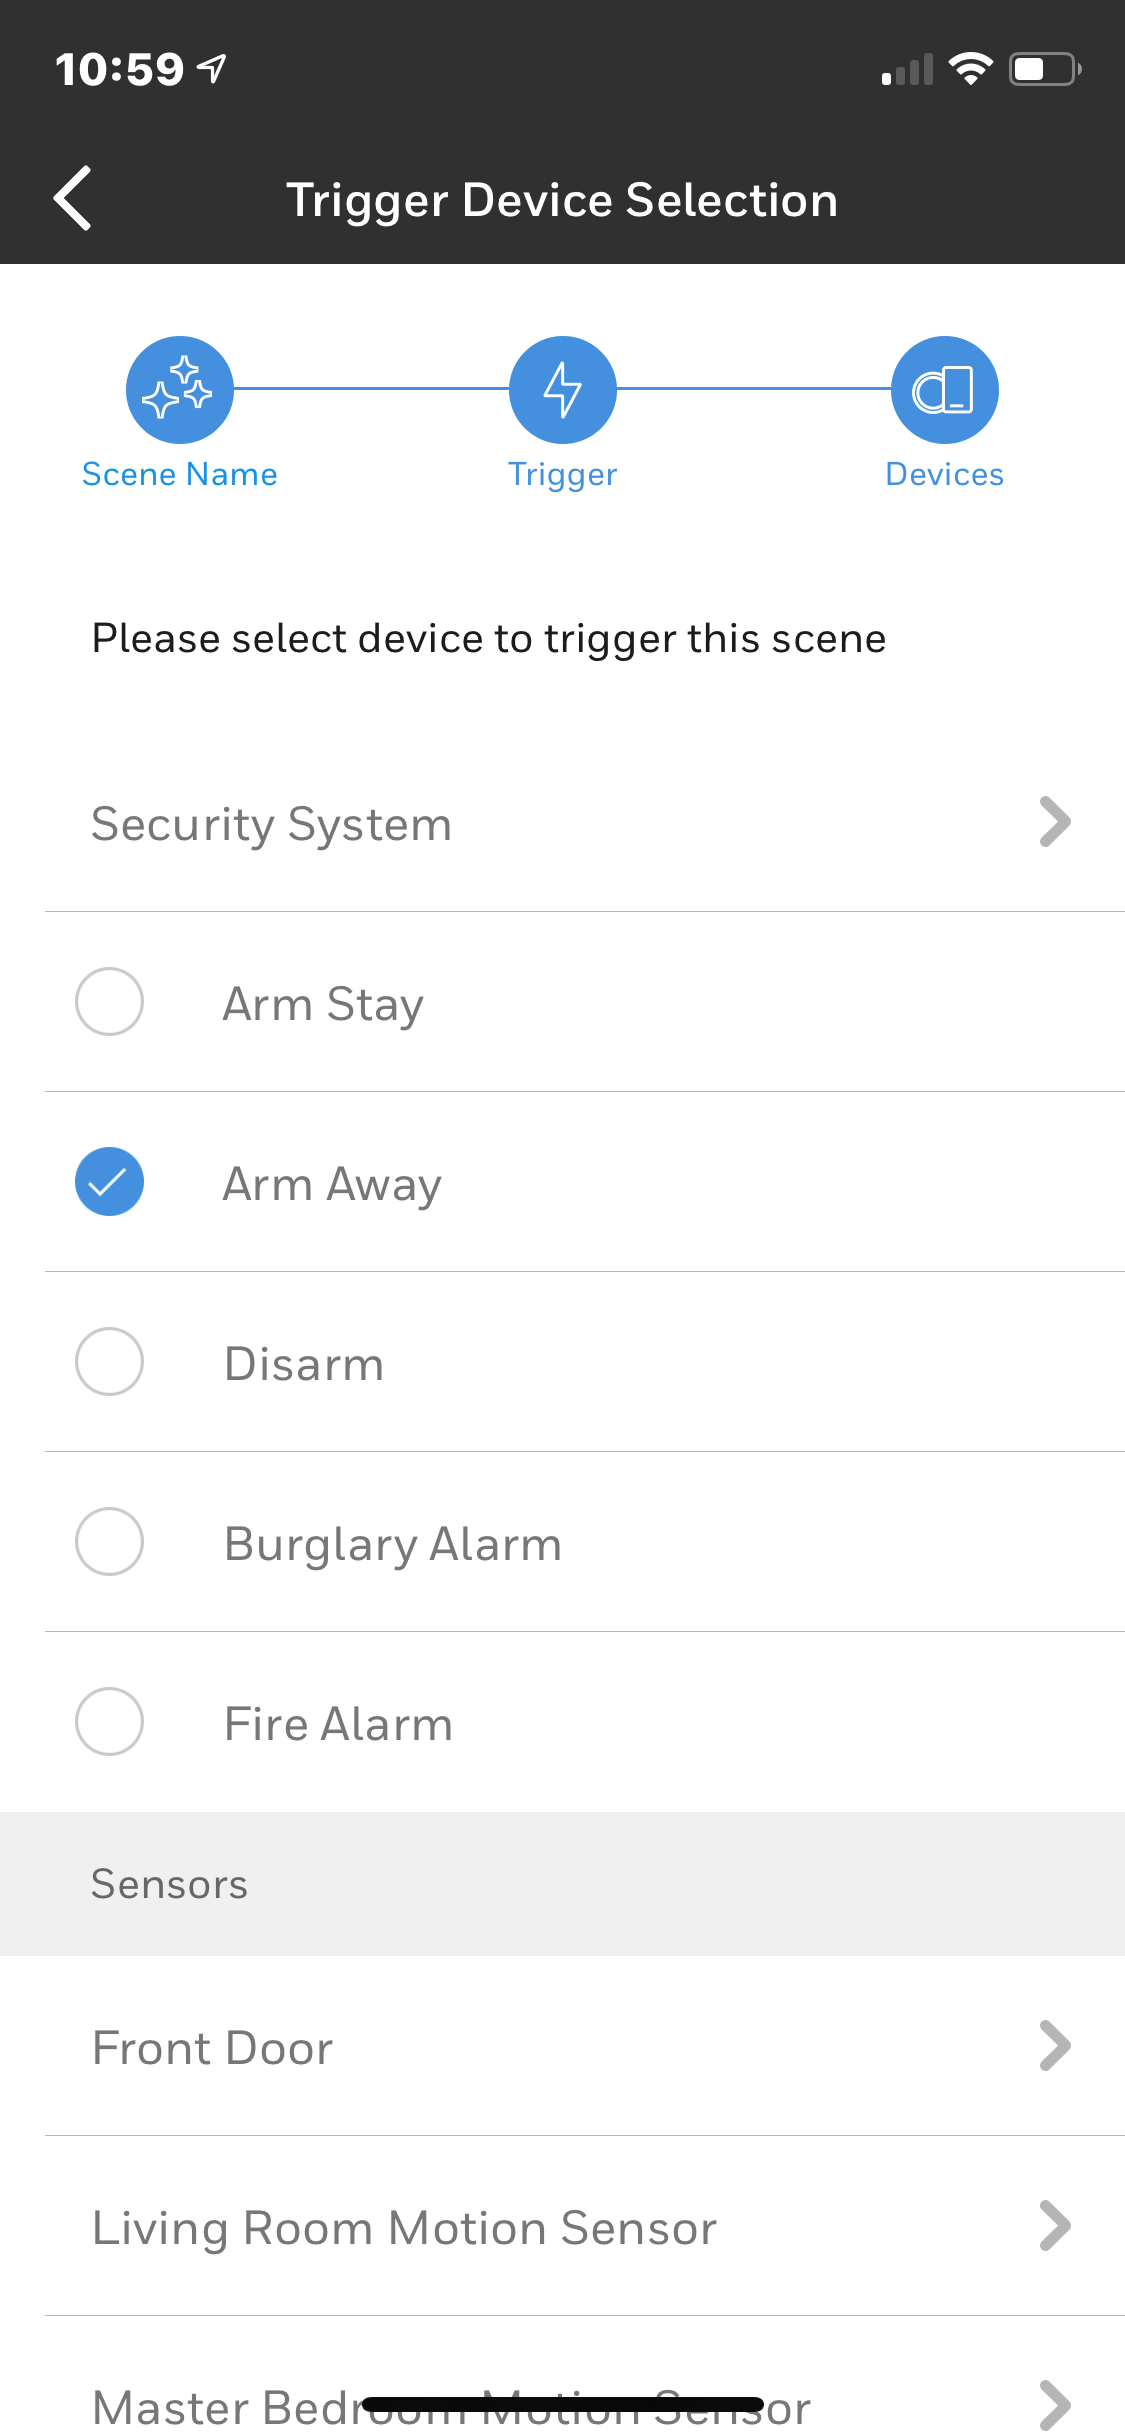
Select when the scene will trigger, Select by some device & TAP on Next near bottom.

Step 3
TAP on Arm Away within Security System section & then TAP on Next near bottom
Step 4
TAP on Door Lock under locks
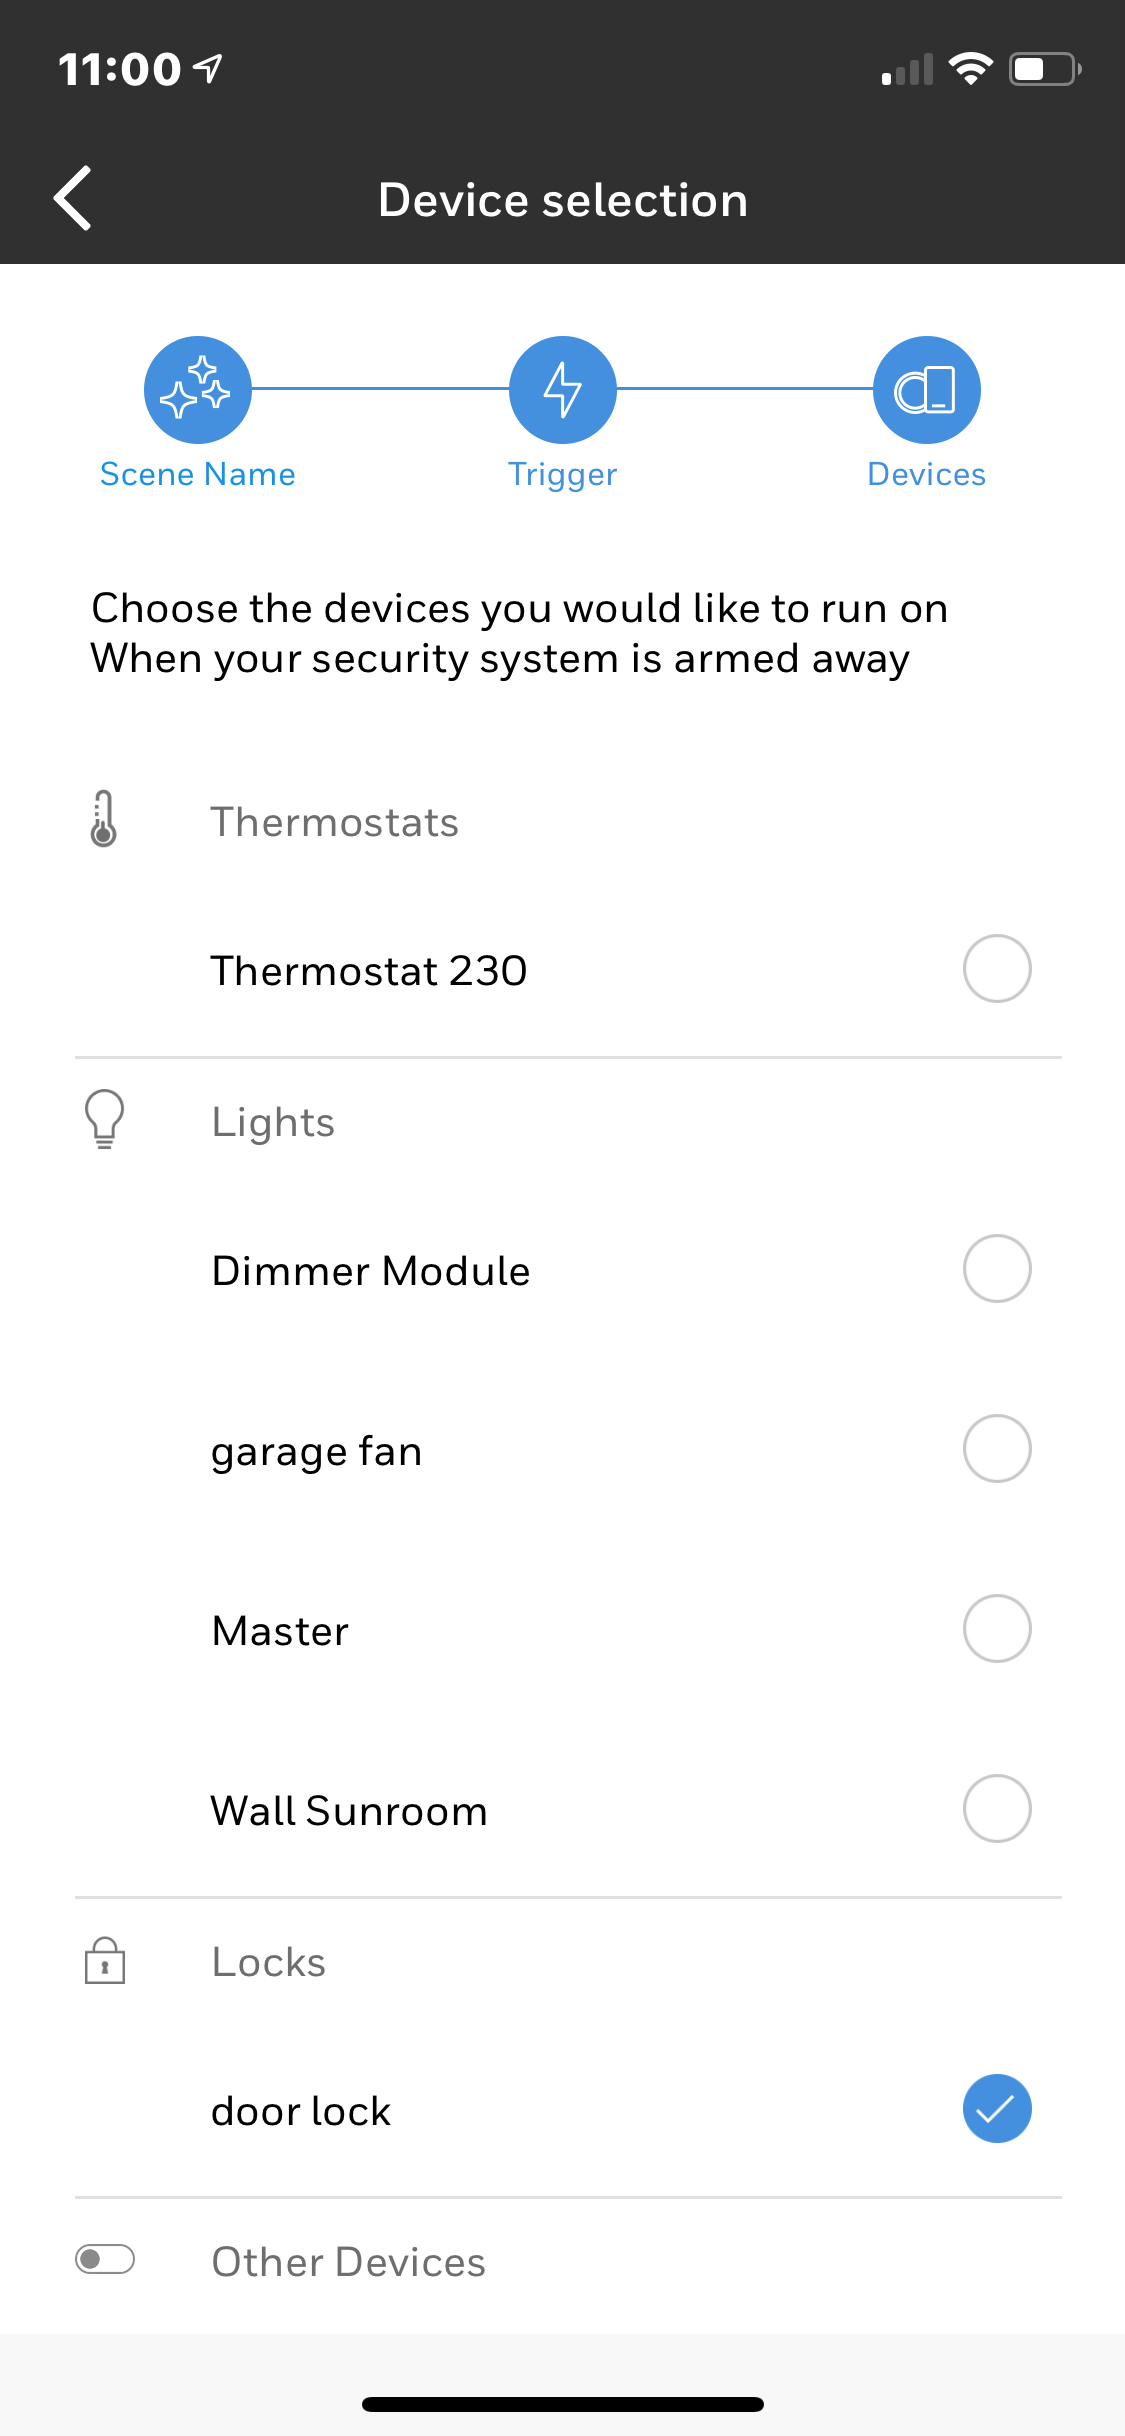
Step 5
TAP on door lock & then TAP on Next near bottom
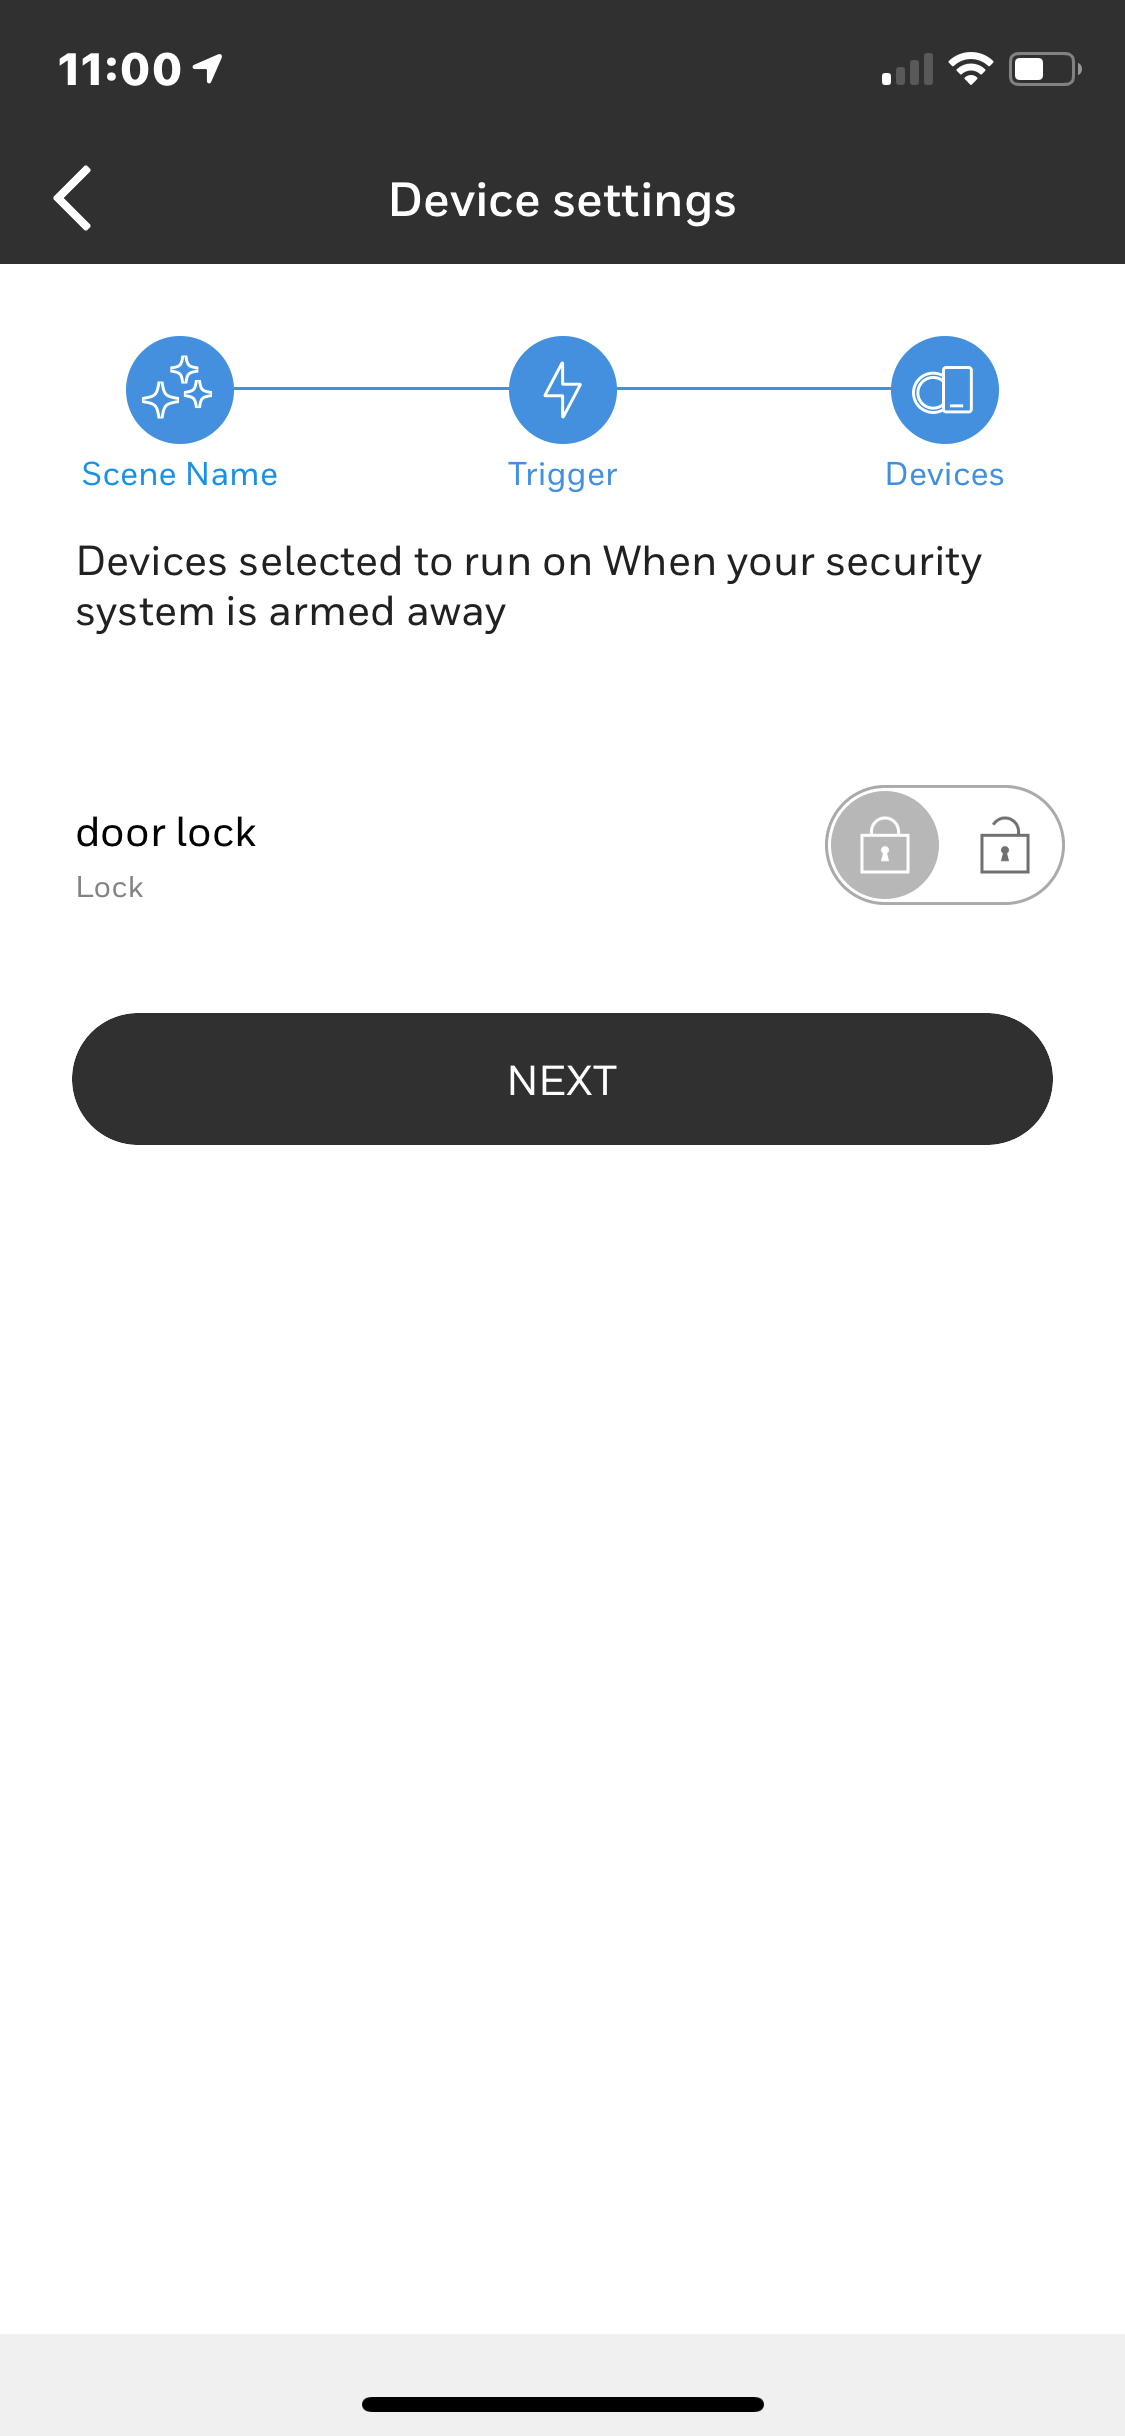
Step 6
This screen concludes the set up. It displays your Scene, TRIGGER and what will occur via the TRIGGER. If this is what you wanted to create, just hit SAVE and you're done. Check the operation by testing and if necessary, you can always edit your scene at any time.
Note: To create the other two scenes, simply replace section 3 above, with the command that you require. Use "armed stay" or "disarm" while using all of the same terms in the first section.
Bear in mind that any automated scene can have consequences that you need to consider in advance. For example: You are at home and disarm your system, while at the same time, you have also actually unlocked your front door. This is possibly convenient on the one hand but on the negative side, you've also just allowed access into your home. Are you, or are you not, satisfied that this is a good idea? Will you remember to lock your door in the event that you are not soon departing?
A benefit not normally immediately recognized with your automated door lock and this set up, is that even when you lock or unlock your door manually, it will now display on your TC 2.0 APP. Just make sure you have a manual door lock scene in the automation section, so that you can lock and unlock your door from anywhere.
If you have done all of the above correctly, there is still one more final step that must be performed before trying to use your lock. Go to your phone App and click on ( My Profile ) If any details need filling, enter those also. Toggle on ( Enable User Code Sync ) ( Push User Code to Locks ) and ( Unlock disarms panel ) Next, Tap on ( My Location ) fill in details if needed. Click on ( Sync Users ) wait a few minutes. Next, Click on (Sync Panel ) Your code should now work normally. Take your time and explore the many options in your TC2.0 app. If you need assistance, text or call
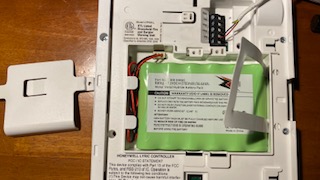
Yes, we can sell you a system battery and it's located on the accessories page. However, in all good conscience, I recommend going to Amazon for this product. The reason is simple. When we buy it from our Honeywell distributor, we generally pay at least $20. or more, plus extra for shipping. Since that's about $40. we ask you to get it elsewhere cause we're not here to rip people off. All batteries are virtually the same, so get your best deal and we'll still perform our duties and assist when it's needed. Your replacement should be a heavy duty battery, so your search should include "Lyric system battery" or "Pro Series System battery" and ""Heavy Duty."" The picture below should be all you need to compare. It's a 7.2 volt 3700 ma.

Lyric System batteries are easy to replace so long as you follow these step by step instructions. Only two tools may be required, a small phillips driver and a small flathead driver.
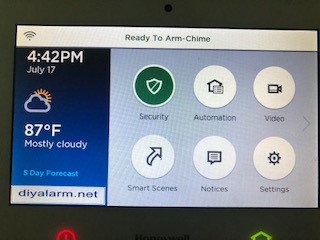
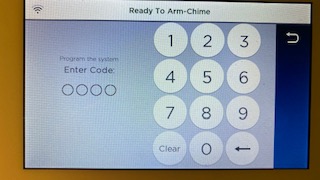
Step 1 - Tap on Security
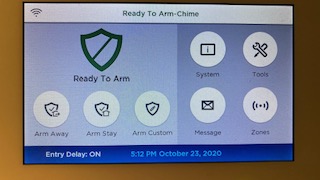
Step 2 - Tap on Tools
Step 3 - Enter Your Master User Code
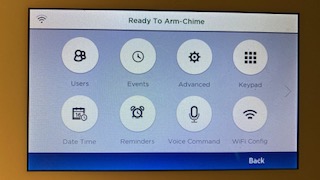
Step 4 - Tap on Advanced
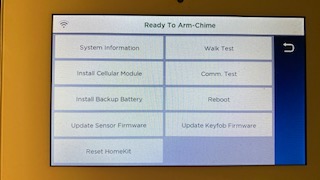
Step 5 - Tap on Install BackUp Battery
Step 6 - Tap on Yes
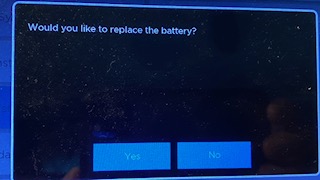
Step 7 - Tap on OK
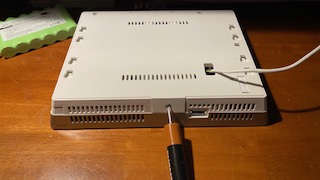
Step 8 - Remove bottom screw with Phillips Driver - Use Straight edge driver to remove back lid
Step 9 - Remove battery holder and holder screw & dispose of plastic battery holder.

Step 10 - Since the new battery should be far larger, you may also dispose of U shaped paper over battery area.
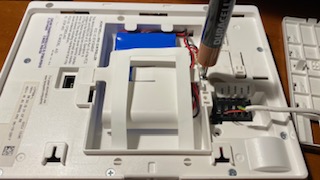
Step 11 - Unplug & remove old battery.
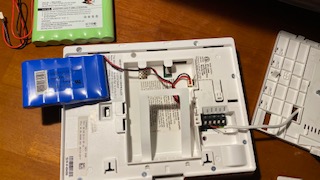
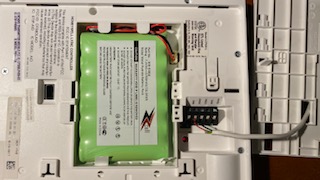
Step 12 - Place the new battery in with wires out of the way
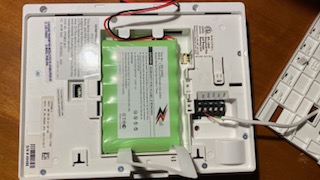
Step 13 - Plug in and assure nice fit
Step 14 - The plastic battery holder is not used with this larger battery. The back cover will hold it in place.
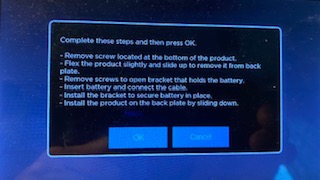
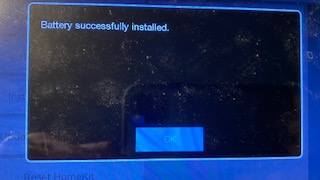
Step 15 - Install the back cover with screw in place and assure a secure fit. Roll your control back to front side. A screen appears to confirm the installation. Tap on OK.
Step 16 - On the next screen you will see a back arrow top right, Tap to return to your Home Screen
If ordering contacts separately for an existing system, when you receive your mini contact, please do not mount it until we have verified that it is fully functional. This unit has been designed for faster installation, particularly when installing many units at the same time, which is termed, batch installation. The unit will have a pull tab to activate the battery but do not remove the tab, just yet.
The process for getting your new mini contact logged into your system is simple, so long as we work together and so long as I have completed unlocking your system in advance, which must be done whenever new equipment is installed. Here are the steps that we will follow:
1.Call Dave and advise that the unit has arrived. Suggest a date and time that you would like to conduct the installation. I am flexible but having my computer program ready to go will facilitate the job.
2. Unbox the unit and place it, along with the magnet, on a counter or table, as close as possible to your control panel. I will prompt you one step at a time but again, please do not try and do this on your own.
3. On your control panel, we will go to TOOLS. Tap on Tools.
4. I will then give you a code to enter.
5. Next screen, Tap on Progam.
6. Next screen Tap on Zones.
7. Next screen, at the right side. Tap on START batch programming.
8. At this point you will activate by removing the battery tab. Alternately, you can also move the magnet and contact together and then apart. You should then see the unit log itself into an open zone allocation, as NEW.
9. Use the Back Arrow to return to your home screen
I will now access your system and sync your new unit with my computer program. When this is complete, I will set up your zone for location name, chime, delay or instant, etc. The new information will then be synced back to your control at which time your mini should be fully functional.
The purpose of this feature is to have your system disarm itself when you enter a delay zone. This is especially helpful when you enter a garage and first need to unload things from your vehicle.
On TC2.0. in SCENES, you can also set up your garage door to Alert you in the event that you have departed without closing it. You simply set up a Perimeter warning, the system knows if the door was left opened and you receive an alert.
Te Set Up Bluetooth, Acivate the screen by touching it, so that it appears white. If you now see three small lines bottom center, TAP the lines. Scroll down to SETTINGS. Tap on USER MANAGEMENT. Enter your Master code. Tap on Master. Tap on Disarm with Bluetooth. Changes screen, the Tap on PAIR.
On your phone go to Setting where you pair a blutooth item. When you see Pro 7, tap to enter and PAIR. Click SAVE on Pro 7 then go back to Main Screen. Repeat this procedure to add more phones.
You can read all about this unit here https://www.diyalarm.net/parts.html
However, I want to tell you how it reacts in real life. First of all, it's a motion detector, same as any other. Where it differs is that in the event of an alarm, you will get a clip of what caused the alarm. At last, you can determine if it's a real intruder, or if the cat jumped up in front of it and caused the alarm. You set it up in TC2.0 and it will send you an immediate notification. If the alarm is disarmed, then it's not an active camera, so it only works in armed mode. For my own place, I'll never again purchase a "motion only detector". It cost a little more but it's worth every penny.
TEXT first for Fastest Response

Copyrights © Dave Lemay
diyalarm.net
All Rights Reserved